
En trin-for-trin Jenkins installationsvejledning.
I denne artikel lærer vi, hvordan du installerer Jenkins på følgende operativsystemer.
For alle ovennævnte operativsystemer varierer Jenkins installationstrin en smule, men konfigurationstrinene er de samme.
Hvad er Jenkins?
Jenkins er et open source automatiseringsbyggeværktøj til udviklere til at løbe rundt i projekter og applikationer. Det bruges til at bygge og implementere software og applikationer. Det er en kraftfuld automatiseringsapplikation, der tillader konstant integration og kontinuerlig levering af projekter, uanset hvilken platform du arbejder på.
Da Jenkins er en Java-applikation, kører den selvstændigt af enhver maskine med et Java Runtime Environment (JRE) installeret.
Hvis du ønsker at lære Jenkins, så tjek dette online kursus at blive en helt fra nul.
Indholdsfortegnelse
Forudsætning
JDK8+ er obligatorisk for alle operativsystemer. Så først skal vi installere JDK8 eller nyere version. Du kan downloade og installere den herfra.
Jenkins installation på Windows
Når JDK er installeret og kører, er vi klar til at downloade og installere Jenkins. Klik her for at downloade den seneste Jenkins MSI-pakke til Windows.
- Dobbeltklik på jenkins.msi for at starte installationen.
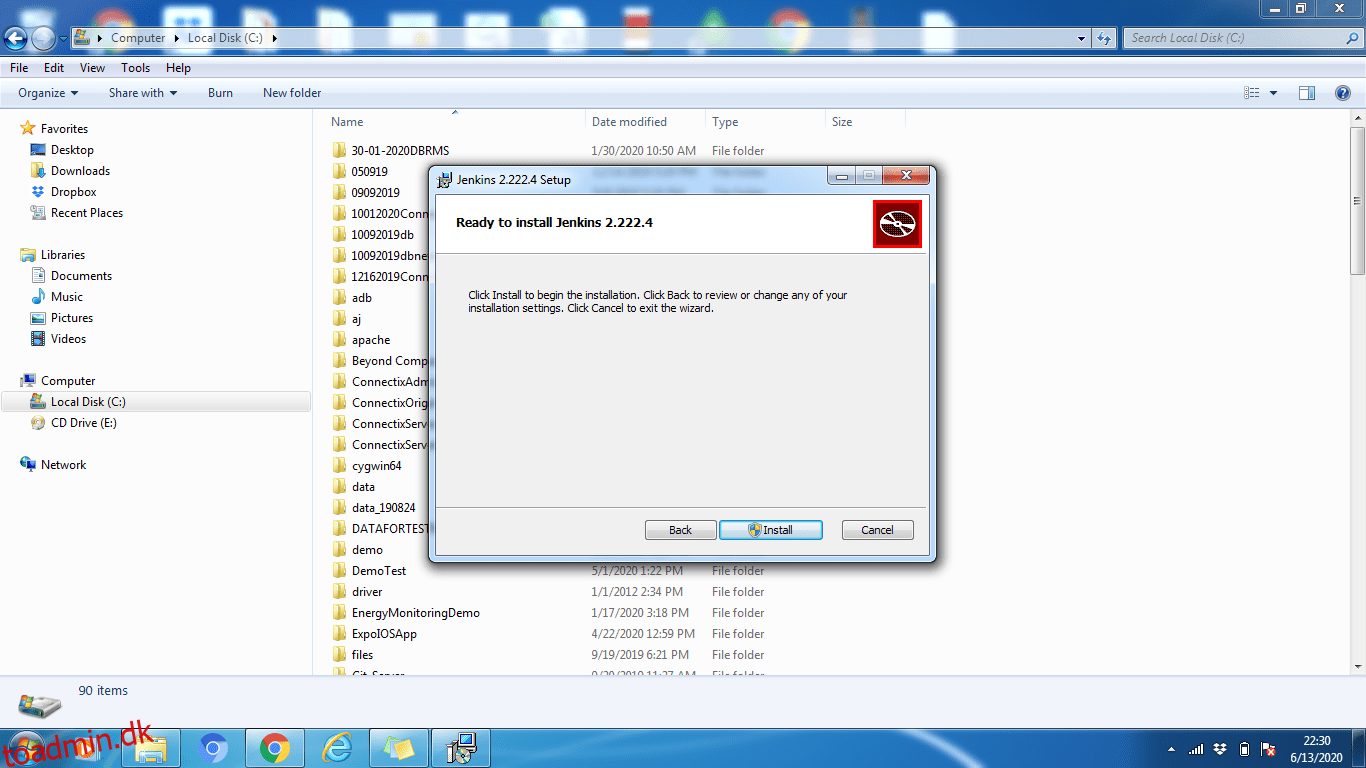
- Klik på Næste og installer derefter

- Klik på knappen Skift, hvis du vil installere det i en anden mappe. I dette eksempel beholder vi standardindstillingen, klik på Næste

- Når du er færdig med installationsprocessen, skal du klikke på knappen Udfør for at fuldføre installationen.
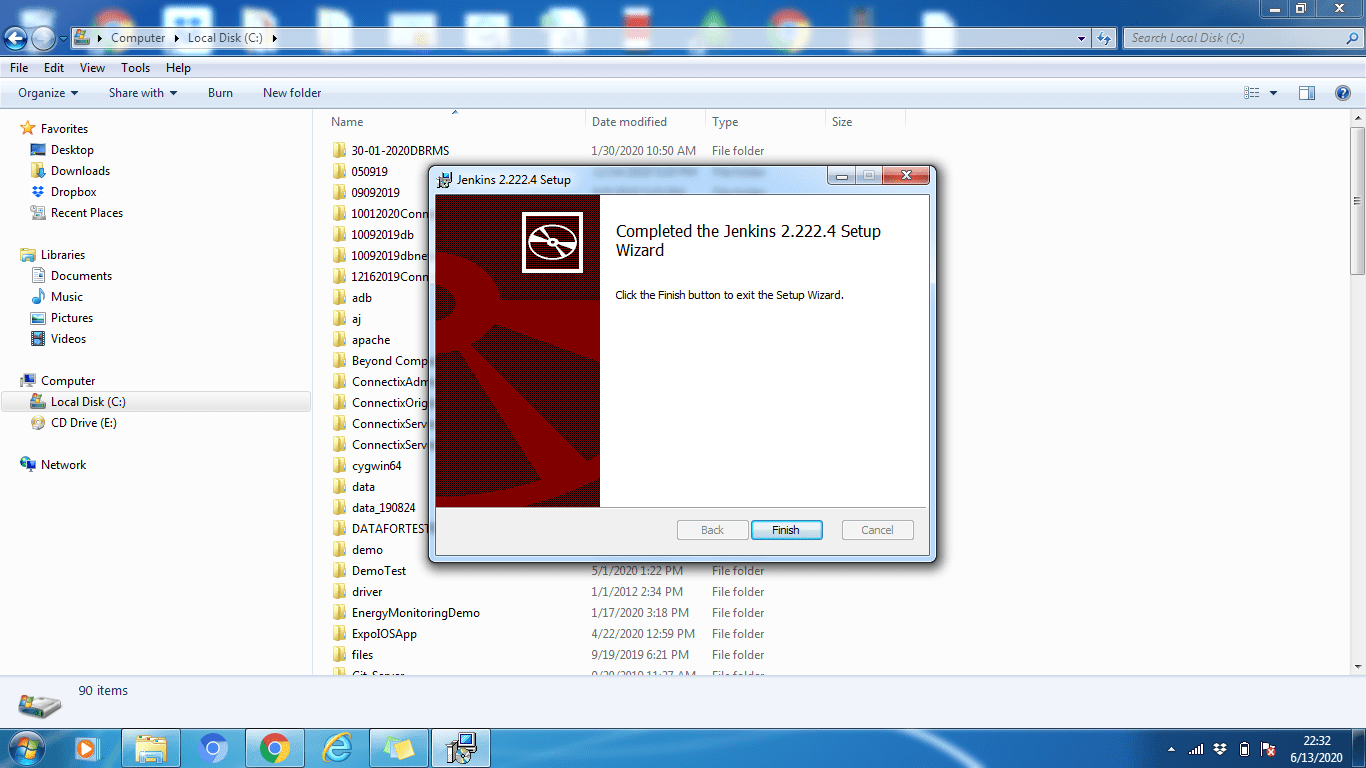
Som du kan se, er Jenkins-installationen i Windows virkelig nem. Ligesom enhver anden standardsoftware.
Jenkins installation på Ubuntu
Som nævnt tidligere, sørg for, at JDK8+ er installeret og kører på Ubuntu-maskinen. Hvis det ikke er installeret, skal du udføre kommandoen nedenfor for at installere det.
sudo apt installer default-jdk-headless
[email protected]:~$ sudo apt install default-jdk-headless
Reading package lists... Done
Building dependency tree
Reading state information... Done
The following NEW packages will be installed:
  default-jdk-headless
0 upgraded, 1 newly installed, 0 to remove and 102 not upgraded.
Need to get 1132 B of archives.
After this operation, 6144 B of additional disk space will be used.
Get:1 http://archive.ubuntu.com/ubuntu bionic-updates/main amd64 default-jdk-headless amd64 2:1.11-68ubuntu1~18.04.1 [1132 B]
Fetched 1132 B in 2s (676 B/s)
Selecting previously unselected package default-jdk-headless.
(Reading database ... 30061 files and directories currently installed.)
Preparing to unpack .../default-jdk-headless_2%3a1.11-68ubuntu1~18.04.1_amd64.deb ...
Unpacking default-jdk-headless (2:1.11-68ubuntu1~18.04.1) ...
Setting up default-jdk-headless (2:1.11-68ubuntu1~18.04.1) ...
[email protected]:~$
For at bekræfte, at Java er blevet installeret korrekt, skal du udføre kommandoen nedenfor:
java -version
[email protected]:~$ java -version
openjdk version "11.0.7" 2020-04-14
OpenJDK Runtime Environment (build 11.0.7+10-post-Ubuntu-2ubuntu218.04)
OpenJDK 64-Bit Server VM (build 11.0.7+10-post-Ubuntu-2ubuntu218.04, mixed mode, sharing)
[email protected]:~$
Når det er installeret, så er vi gode til at gå til Jenkins installation.
Installationstrin:
Trin 1: Åbn først kommandoterminalen (Ctrl + Alt + T)
Trin 2: For at installere Jenkins, lad os tilføje lagernøgle til systemet
wget -q -O – http://pkg.jenkins-ci.org/debian/jenkins-ci.org.key | sudo apt-key add –
[email protected]:~$ wget -q -O - http://pkg.jenkins-ci.org/debian/jenkins-ci.org.key | sudo apt-key add -
OK
[email protected]:~$
Trin 3: Når nøglen er tilføjet, skal vi tilføje Debian-pakkens repos-adresse til maskinen.
sudo sh -c ‘echo deb http://pkg.jenkins-ci.org/debian-stable binary/ > /etc/apt/sources.list.d/jenkins .list’
Trin 4: Opdater nu Ubuntu-pakker
sudo apt update
[email protected]:~$ sudo apt update
Hit:1 http://archive.ubuntu.com/ubuntu bionic InRelease
Get:2 http://archive.ubuntu.com/ubuntu bionic-updates InRelease [88.7 kB]
Ign:3 http://pkg.jenkins-ci.org/debian-stable binary/ InRelease
Get:4 http://pkg.jenkins-ci.org/debian-stable binary/ Release [2044 B]
Get:5 http://pkg.jenkins-ci.org/debian-stable binary/ Release.gpg [195 B]
Get:6 http://archive.ubuntu.com/ubuntu bionic-backports InRelease [74.6 kB]
Get:7 http://archive.ubuntu.com/ubuntu bionic/universe amd64 Packages [8570 kB]
Get:8 http://pkg.jenkins-ci.org/debian-stable binary/ Packages [17.6 kB]
Get:9 http://security.ubuntu.com/ubuntu bionic-security InRelease [88.7 kB]
Get:10 http://security.ubuntu.com/ubuntu bionic-security/main amd64 Packages [748 kB]
Get:11 http://security.ubuntu.com/ubuntu bionic-security/main Translation-en [237 kB]
Get:12 http://security.ubuntu.com/ubuntu bionic-security/restricted amd64 Packages [50.8 kB]
Get:13 http://security.ubuntu.com/ubuntu bionic-security/restricted Translation-en [12.3 kB]
Get:14 http://security.ubuntu.com/ubuntu bionic-security/universe amd64 Packages [673 kB]
Get:15 http://security.ubuntu.com/ubuntu bionic-security/universe Translation-en [223 kB]
Get:16 http://security.ubuntu.com/ubuntu bionic-security/multiverse amd64 Packages [7808 B]
Get:17 http://security.ubuntu.com/ubuntu bionic-security/multiverse Translation-en [2856 B]
Get:18 http://archive.ubuntu.com/ubuntu bionic/universe Translation-en [4941 kB]
Get:19 http://archive.ubuntu.com/ubuntu bionic/multiverse amd64 Packages [151 kB]
Get:20 http://archive.ubuntu.com/ubuntu bionic/multiverse Translation-en [108 kB]
Get:21 http://archive.ubuntu.com/ubuntu bionic-updates/main amd64 Packages [969 kB]
Get:22 http://archive.ubuntu.com/ubuntu bionic-updates/main Translation-en [329 kB]
Get:23 http://archive.ubuntu.com/ubuntu bionic-updates/restricted amd64 Packages [60.5 kB]
Get:24 http://archive.ubuntu.com/ubuntu bionic-updates/restricted Translation-en [14.7 kB]
Get:25 http://archive.ubuntu.com/ubuntu bionic-updates/universe amd64 Packages [1085 kB]
Get:26 http://archive.ubuntu.com/ubuntu bionic-updates/universe Translation-en [337 kB]
Get:27 http://archive.ubuntu.com/ubuntu bionic-updates/multiverse amd64 Packages [15.9 kB]
Get:28 http://archive.ubuntu.com/ubuntu bionic-updates/multiverse Translation-en [6420 B]
Get:29 http://archive.ubuntu.com/ubuntu bionic-backports/main amd64 Packages [7516 B]
Get:30 http://archive.ubuntu.com/ubuntu bionic-backports/main Translation-en [4764 B]
Get:31 http://archive.ubuntu.com/ubuntu bionic-backports/universe amd64 Packages [7484 B]
Get:32 http://archive.ubuntu.com/ubuntu bionic-backports/universe Translation-en [4436 B]
Fetched 18.8 MB in 58s (327 kB/s)
Reading package lists... Done
Building dependency tree
Reading state information... Done
102 packages can be upgraded. Run 'apt list --upgradable' to see them.
[email protected]:~$
Trin 5: Til sidst for at installere Jenkins, udfør nedenstående kommando
sudo apt install jenkins
[email protected]:~$ sudo apt install jenkins
Reading package lists... Done
Building dependency tree
Reading state information... Done
The following additional packages will be installed:
  daemon
The following NEW packages will be installed:
  daemon jenkins
0 upgraded, 2 newly installed, 0 to remove and 102 not upgraded.
Need to get 65.7 MB of archives.
After this operation, 66.8 MB of additional disk space will be used.
Do you want to continue? [Y/n] Y
Get:1 http://archive.ubuntu.com/ubuntu bionic/universe amd64 daemon amd64 0.6.4-1build1 [99.5 kB]
Get:2 http://pkg.jenkins-ci.org/debian-stable binary/ jenkins 2.235.1 [65.6 MB]
Fetched 65.7 MB in 3min 34s (307 kB/s)
Selecting previously unselected package daemon.
(Reading database ... 29242 files and directories currently installed.)
Preparing to unpack .../daemon_0.6.4-1build1_amd64.deb ...
Unpacking daemon (0.6.4-1build1) ...
Selecting previously unselected package jenkins.
Preparing to unpack .../jenkins_2.235.1_all.deb ...
Unpacking jenkins (2.235.1) ...
Setting up daemon (0.6.4-1build1) ...
Setting up jenkins (2.235.1) ...
invoke-rc.d: could not determine current runlevel
Processing triggers for systemd (237-3ubuntu10.39) ...
Processing triggers for man-db (2.8.3-2ubuntu0.1) ...
Processing triggers for ureadahead (0.100.0-21) ...
[email protected]:~$
Jenkins installeret med succes. Nu kan vi starte Jenkins server.
Trin 6: Start af Jenkins gennem systemctl-kommandoen
sudo systemctl start jenkins
systemctl viser ikke output, så vi kan kontrollere status gennem nedenstående kommando. Gennem denne kommando kan vi kontrollere, om Jenkins er aktiv eller ej.
sudo systemctl status jenkins
[email protected]:~$ sudo systemctl status jenkins
● jenkins.service - LSB: Start Jenkins at boot time
   Loaded: loaded (/etc/init.d/jenkins; generated)
   Active: active (exited) since Sat 2020-04-04 10:10:19 UTC; 2 months 16 days ago
     Docs: man:systemd-sysv-generator(8)
    Tasks: 0 (limit: 4915)
   CGroup: /system.slice/jenkins.service

Apr 04 10:10:18 ip-172-31-17-25 systemd[1]: Starting LSB: Start Jenkins at boot time...
Apr 04 10:10:18 ip-172-31-17-25 jenkins[1984]: Correct java version found
Apr 04 10:10:18 ip-172-31-17-25 jenkins[1984]:  * Starting Jenkins Automation Server jenkins
Apr 04 10:10:18 ip-172-31-17-25 su[2037]: Successful su for root by root
Apr 04 10:10:18 ip-172-31-17-25 su[2037]: + ??? root:root
Apr 04 10:10:18 ip-172-31-17-25 su[2037]: pam_unix(su:session): session opened for user root by (uid=0)
Apr 04 10:10:18 ip-172-31-17-25 jenkins[1984]: mesg: ttyname failed: Inappropriate ioctl for device
Apr 04 10:10:18 ip-172-31-17-25 su[2037]: pam_unix(su:session): session closed for user root
Apr 04 10:10:19 ip-172-31-17-25 jenkins[1984]:    ...done.
Apr 04 10:10:19 ip-172-31-17-25 systemd[1]: Started LSB: Start Jenkins at boot time.
[email protected]:~$
Trin 6: Konfiguration af port (valgfrit)
Som standard køres Jenkins på 8080-porten, og vi skal gøre denne port tilgængelig hvor som helst (hvis den ikke er tilgængelig).
Lad os åbne porten:
sudo ufw tillade 8080
Vi kan kontrollere status for porten under følgende kommando:
sudo ufw status
[email protected]:~$ sudo ufw status
Status: active
To           Action           From
--           ------           ----
8080         ALLOW            Anywhere
8080 (v6)    ALLOW            Anywhere (v6)
[email protected]:~$
Hvis status viser firewall inaktiv, så kør følgende kommando ellers er det ikke nødvendigt
sudo ufw tillade OpenSSH
efterfulgt af
sudo ufw enable
Jenkins installation på CentOS
Først skal du sikre dig, at JDK8+ er installeret og kører på maskinen. Hvis det ikke er installeret, udfør nedenstående kommando for at installere OpenJDK 8-pakken.
sudo yum install java-1.8.0-openjdk-devel
[[email protected] ~]$ sudo yum install java-1.8.0-openjdk-devel
CentOS-8 - AppStream                            1.0 kB/s | 4.3 kB     00:04
CentOS-8 - AppStream                            397 kB/s | 5.8 MB     00:14
CentOS-8 - Base                                 3.5 kB/s | 3.9 kB     00:01
CentOS-8 - Extras                               547  B/s | 1.5 kB     00:02
Jenkins-stable                                  6.5 kB/s | 2.9 kB     00:00
Dependencies resolved.
================================================================================
 Package                   Arch    Version                     Repository  Size
================================================================================
Installing:
 java-1.8.0-openjdk-devel  x86_64  1:1.8.0.252.b09-3.el8_2     AppStream  9.8 M

Transaction Summary
================================================================================
Install  1 Package

Total download size: 9.8 M
Installed size: 41 M
Is this ok [y/N]: y
Downloading Packages:
java-1.8.0-openjdk-devel-1.8.0.252.b09-3.el8_2. 531 kB/s | 9.8 MB     00:18
--------------------------------------------------------------------------------
Total                                           507 kB/s | 9.8 MB     00:19
Running transaction check
Transaction check succeeded.
Running transaction test
Transaction test succeeded.
Running transaction
  Preparing        :                                                        1/1
  Installing       : java-1.8.0-openjdk-devel-1:1.8.0.252.b09-3.el8_2.x86   1/1
  Running scriptlet: java-1.8.0-openjdk-devel-1:1.8.0.252.b09-3.el8_2.x86   1/1
  Verifying        : java-1.8.0-openjdk-devel-1:1.8.0.252.b09-3.el8_2.x86   1/1
Installed products updated.

Installed:
  java-1.8.0-openjdk-devel-1:1.8.0.252.b09-3.el8_2.x86_64

Complete!
[[email protected] ~]$
For at bekræfte, at Java er blevet installeret korrekt, skal du udføre kommandoen nedenfor
java -version
[[email protected] ~]$ java -version
openjdk version "1.8.0_252"
OpenJDK Runtime Environment (build 1.8.0_252-b09)
OpenJDK 64-Bit Server VM (build 25.252-b09, mixed mode)
[[email protected] ~]$
Når det er installeret, så er vi gode til at gå til Jenkins installation.
Installationstrin
Trin 1: Åbn først Command Terminal
Trin 2: For at installere Jenkins skal vi først downloade og tilføje Jenkins GPG-nøgle:
sudo wget -O /etc/yum.repos.d/jenkins.repo http://pkg.jenkins-ci.org/redhat-stable/jenkins.repo
[[email protected] ~]$ sudo wget -O /etc/yum.repos.d/jenkins.repo http://pkg.jenkins-ci.org/redhat-stable/jenkins.repo
--2020-06-21 04:29:52--  http://pkg.jenkins-ci.org/redhat-stable/jenkins.repo
Resolving pkg.jenkins-ci.org (pkg.jenkins-ci.org)... 52.202.51.185, 64:ff9b::34ca:33b9
Connecting to pkg.jenkins-ci.org (pkg.jenkins-ci.org)|52.202.51.185|:80... connected.
HTTP request sent, awaiting response... 200 OK
Length: 85
Saving to: ‘/etc/yum.repos.d/jenkins.repo’

/etc/yum.repos.d/je 100%[==================>]      85  --.-KB/s    in 0s

2020-06-21 04:29:54 (2.61 MB/s) - ‘/etc/yum.repos.d/jenkins.repo’ saved [85/85]

[[email protected] ~]$
Trin 3: Efter at have downloadet og tilføjet Jenkins GPS-nøgle, næste Importer Jenkins GPG-nøgle:
sudo rpm --import https://jenkins-ci.org/redhat/jenkins-ci.org.key
Trin 4: Opdater CentOS-pakker
sudo yum update
[[email protected] ~]$ sudo yum update
Last metadata expiration check: 0:17:09 ago on Sun 21 Jun 2020 04:21:20 AM PDT.
Dependencies resolved.
Nothing to do.
Complete!
[[email protected] ~]$
Trin 5: Efter opdatering af centos-pakker er vi klar til at installere, Jenkins:
sudo yum install jenkins
[[email protected] ~]$ sudo yum install jenkins
Last metadata expiration check: 0:19:26 ago on Sun 21 Jun 2020 04:21:20 AM PDT.
Dependencies resolved.
===============================================================================
 Package          Architecture    Version               Repository        Size
===============================================================================
Installing:
 jenkins          noarch          2.235.1-1.1           jenkins           63 M

Transaction Summary
===============================================================================
Install  1 Package

Total download size: 63 M
Installed size: 63 M
Is this ok [y/N]: y
Downloading Packages:
jenkins-2.235.1-1.1.noarch.rpm                 172 kB/s |  63 MB     06:16
-------------------------------------------------------------------------------
Total                                          172 kB/s |  63 MB     06:16
Running transaction check
Transaction check succeeded.
Running transaction test
Transaction test succeeded.
Running transaction
  Preparing        :                                                       1/1
  Running scriptlet: jenkins-2.235.1-1.1.noarch                            1/1
  Installing       : jenkins-2.235.1-1.1.noarch                            1/1
  Running scriptlet: jenkins-2.235.1-1.1.noarch                            1/1
  Verifying        : jenkins-2.235.1-1.1.noarch                            1/1
Installed products updated.

Installed:
  jenkins-2.235.1-1.1.noarch

Complete!
[[email protected] ~]$
Trin 6: Start af Jenkins gennem systemctl
sudo systemctl start jenkins
Da systemctl ikke viser outputtet, så kan du tjekke status via nedenstående kommando. Og gennem denne kommando kan du kontrollere, om Jenkins er aktiv eller ej.
sudo systemctl status jenkins
[[email protected] ~]$ sudo systemctl status jenkins
[sudo] password for toadmin.dk:
● jenkins.service - LSB: Jenkins Automation Server
   Loaded: loaded (/etc/rc.d/init.d/jenkins; generated)
   Active: active (running)
     Docs: man:systemd-sysv-generator(8)

Jun 20 11:15:22 localhost.localdomain systemd[1]: Starting LSB: Jenkins Automa>
Jun 20 11:15:23 localhost.localdomain runuser[1456]: pam_unix(runuser:session)>
Jun 20 11:15:33 localhost.localdomain jenkins[1433]: Starting Jenkins [  OK  ]
Jun 20 11:15:33 localhost.localdomain systemd[1]: Started LSB: Jenkins Automat>
Jun 21 04:23:04 localhost.localdomain systemd[1]: Stopping LSB: Jenkins Automa>
[[email protected] ~]$
Trin 7: Konfiguration af porten (valgfrit)
Som standard køres Jenkins på 8080-porten, og vi skal gøre denne port tilgængelig hvor som helst (kun hvis den ikke er tilgængelig). Lad os åbne porten,
sudo firewall-cmd --permanent --zone=public --add-port=8080/tcp
[[email protected] ~]$ sudo firewall-cmd --permanent --zone=public --add-port=8080/tcp
success
[[email protected] ~]$
Efter konfigurering af port genindlæs firewall
sudo firewall-cmd --reload
[[email protected] ~]$ sudo firewall-cmd --reload
success
[[email protected] ~]$
Konfiguration af Jenkins
Når Jenkins er installeret, vil den køre på port 8080, lad os konfigurere den ved at navigere til http://localhost:8080 på vores yndlingsbrowser.
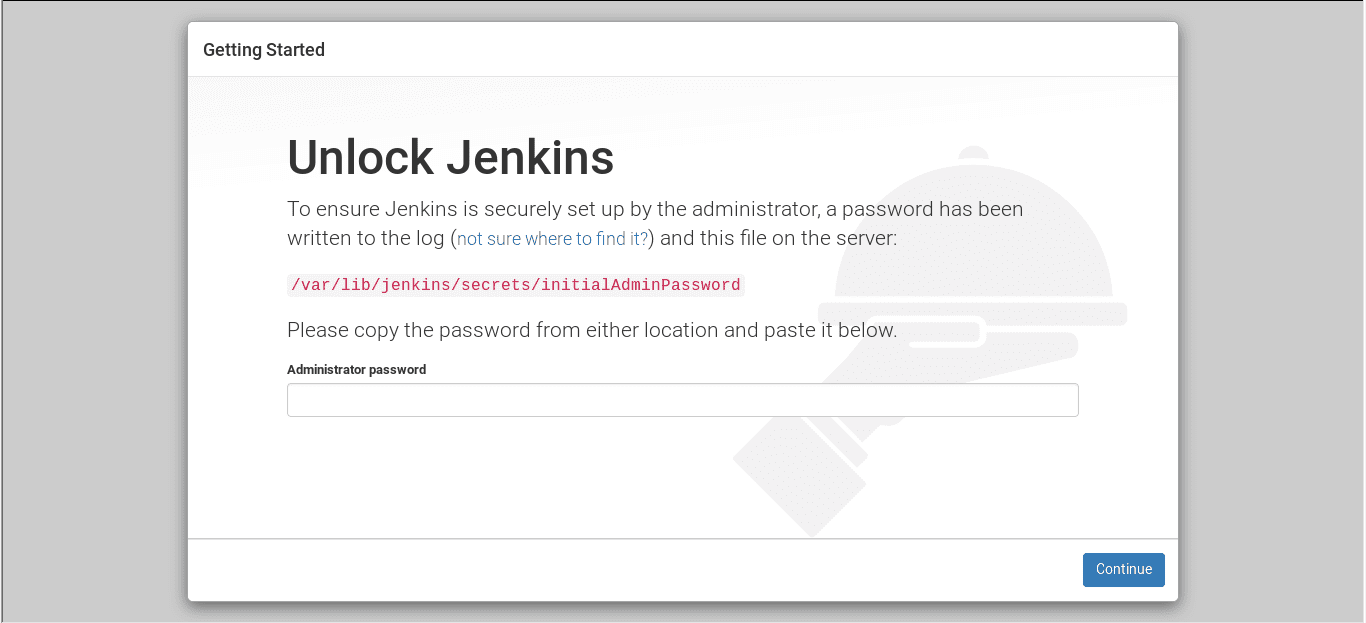
Trin-1: Besøg http://localhost:8080
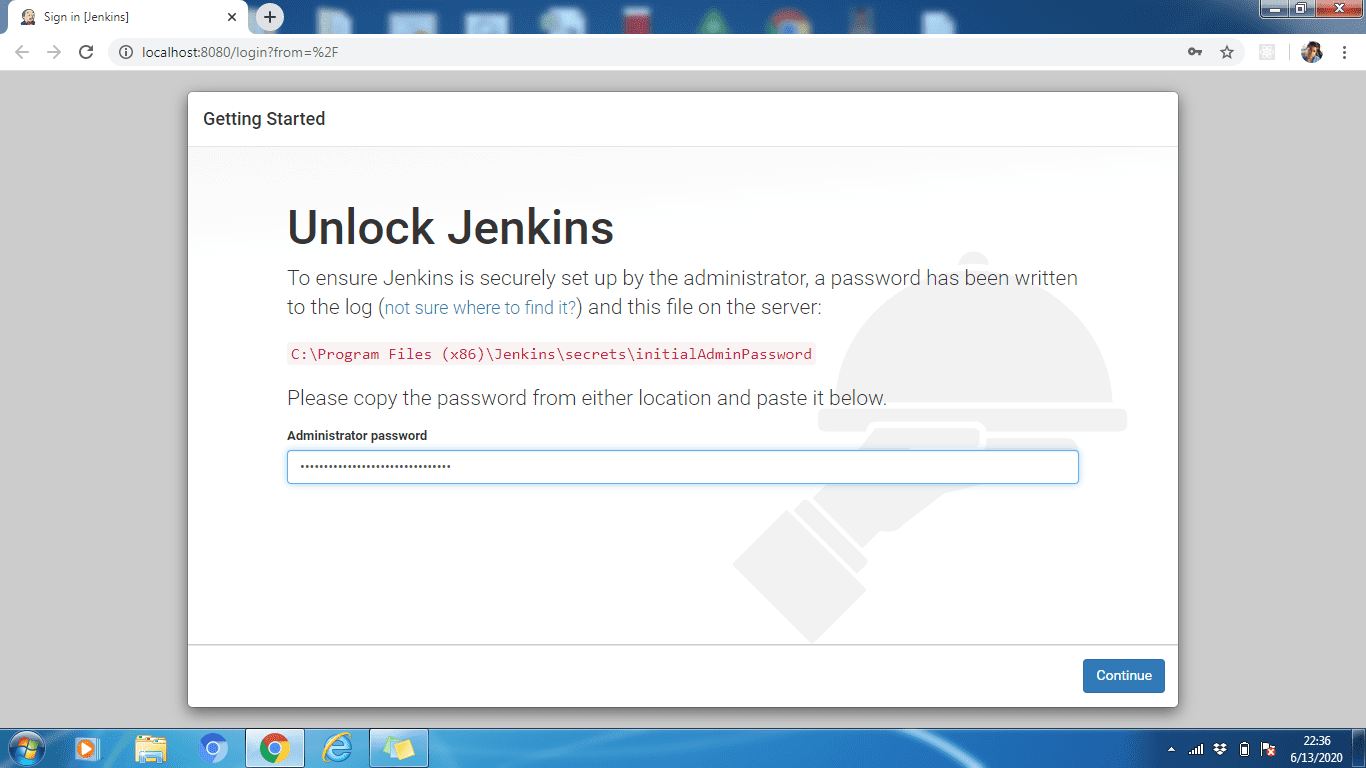
Trin-2: For at låse Jenkins op skal du kopiere administratoradgangskoden fra filen placeret på
C:Program Files (x86)JenkinssecretsinitialAdminPassword
/var/lib/jenkins/secrets/initialAdminPassword
Indsæt det nu i Administratoradgangskode Mark. Klik derefter på Blive ved knap.
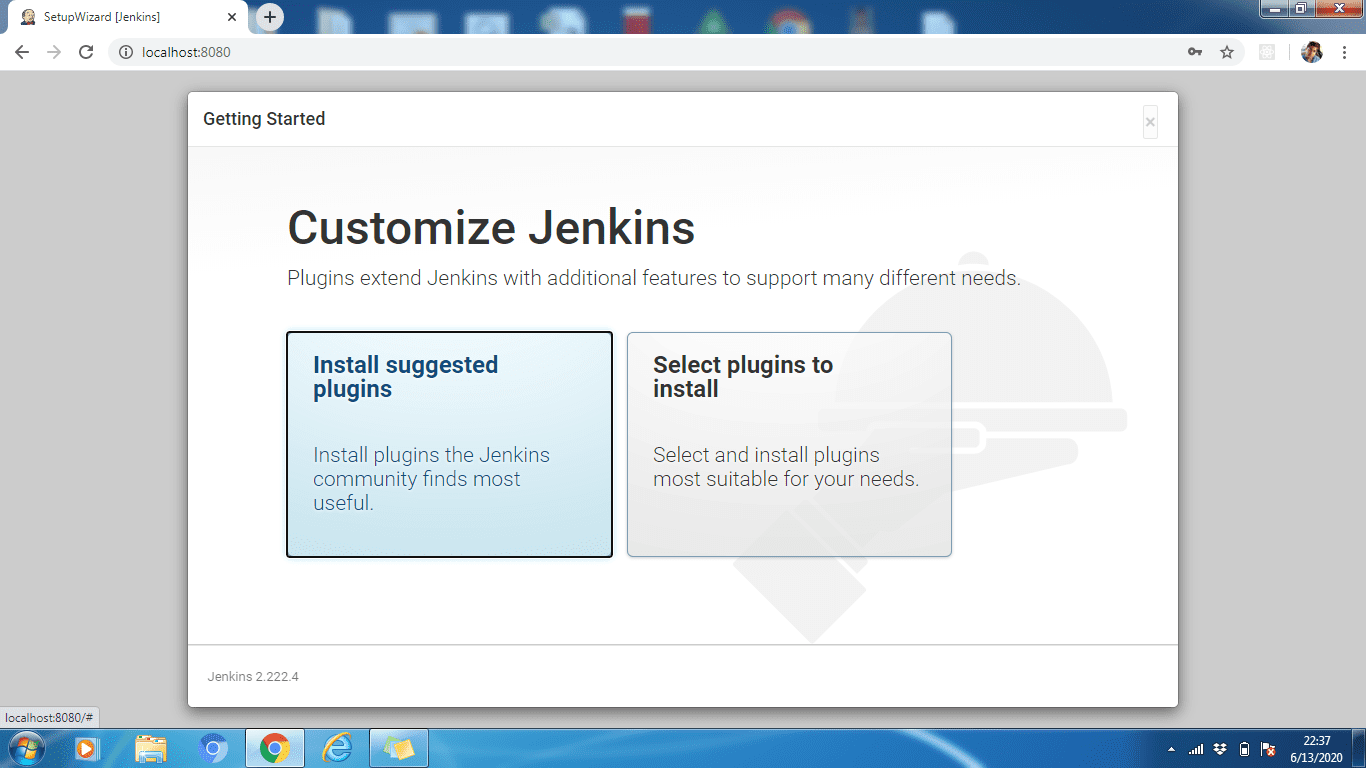
Trin-3: Du kan installere enten foreslåede plugins, eller du kan vælge plugins afhængigt af dit brugstilfælde. Her vil vi installere de foreslåede plugins.
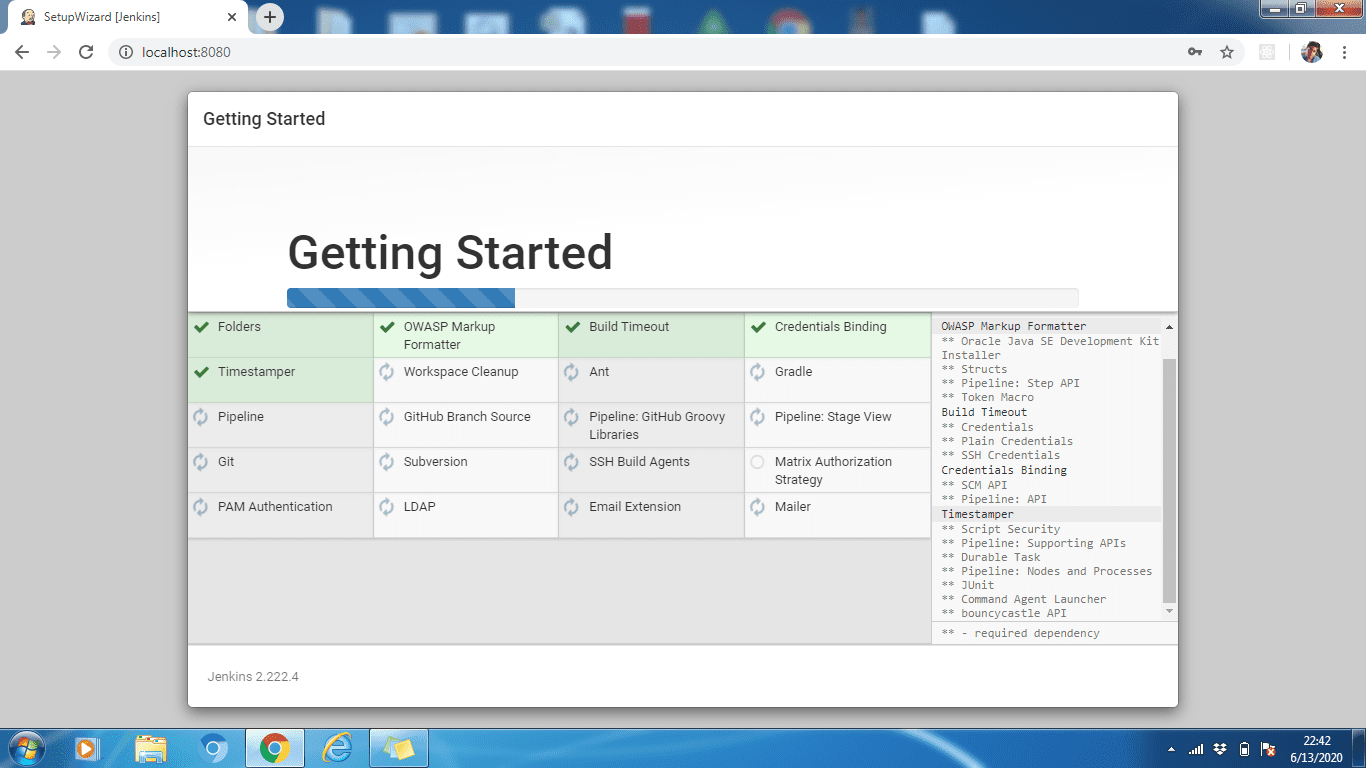
Trin-4: Vent venligst, indtil alle plugin er installeret. Når installationen er færdig, skal du klikke på Fortsæt.
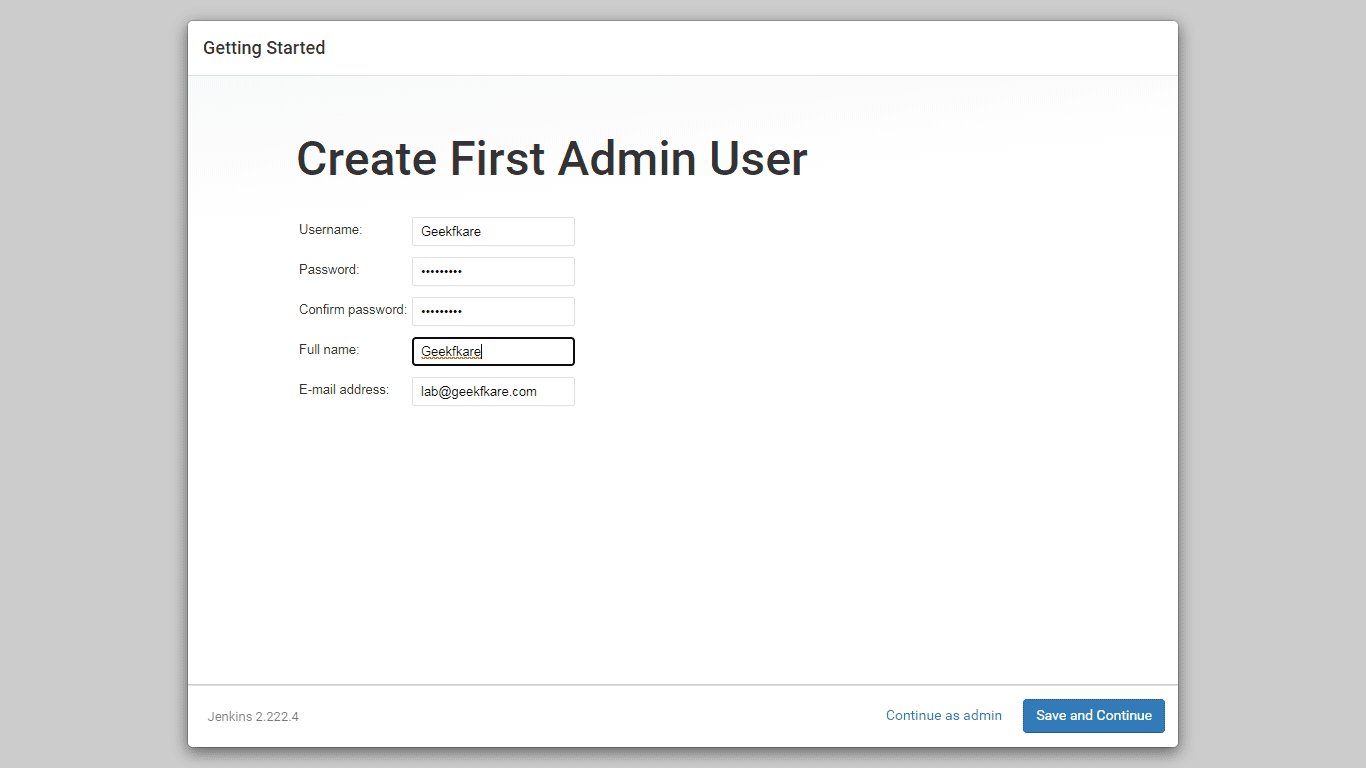
Trin-5: Opret en administratorprofil for Jenkins. Indtast de nødvendige detaljer og klik på Gem og fortsæt.
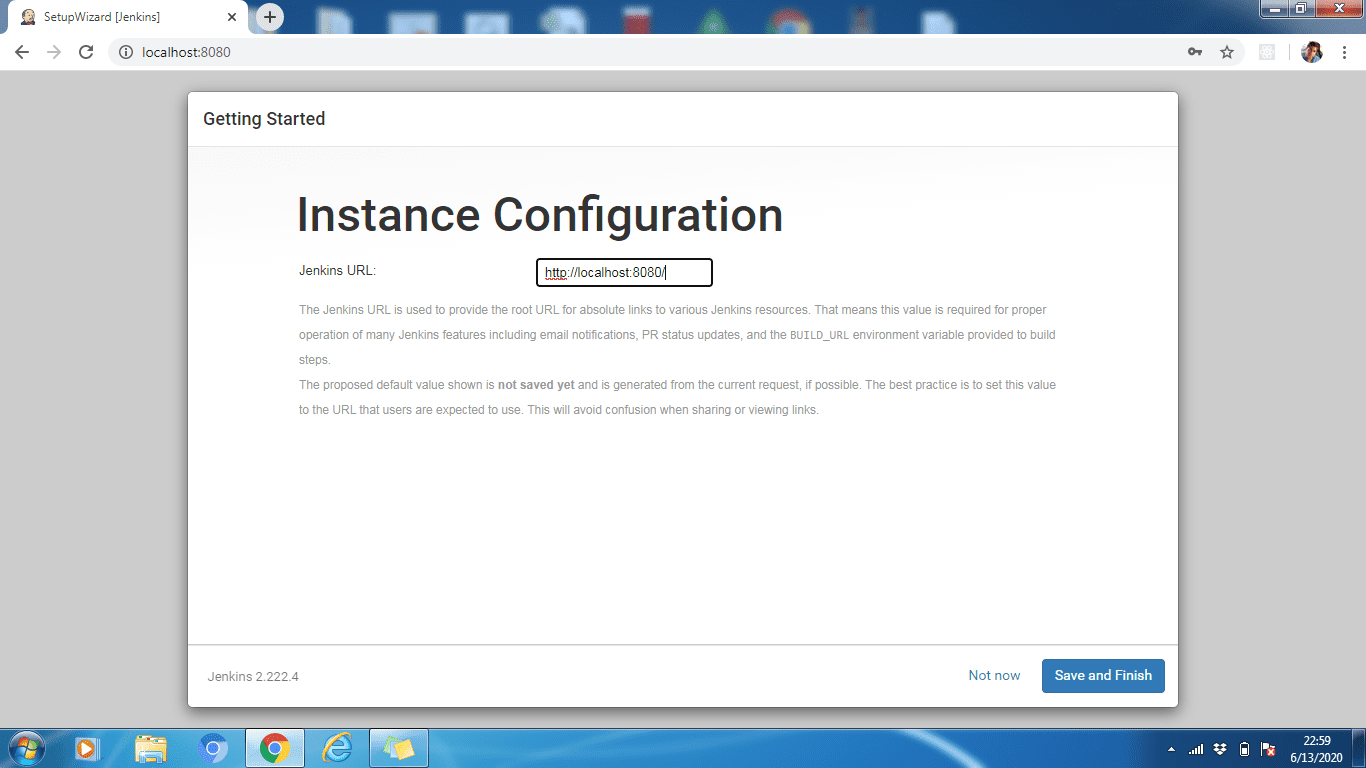
Trin-6: Vi kan ændre Jenkins URL, hvis det kræves, lad os beholde det som standard http://localhost:8080. Klik på Gem og Afslut for at fuldføre konfigurationsprocessen. Klik nu på Begynd at bruge Jenkins

Endelig er konfigurationsprocessen færdig, og ovenstående er standard, Velkommen til Jenkins! side.
Jenkins-konfigurationstrinnet er ens for alle OS, undtagen trin 2, hvor vi skal hente og indtaste administratoradgangskoden. Denne adgangskode kunne hentes fra filen, gem på stien vist på Unlock Jenkins UI.
Konklusion
Så ovenstående var trin til at installere Jenkins på dit foretrukne OS. Lær derefter, hvordan du opretter dine første Jenkins Pipelines.
Jenkins-installationen er nem, og hvis du konfigurerer til fjernholdet, kan du enten få noget Cloud VM og installere det selv eller gå efter Jenkins hostingplatform.